How To Build an Impressive Profile – Part Three | Profile Photos
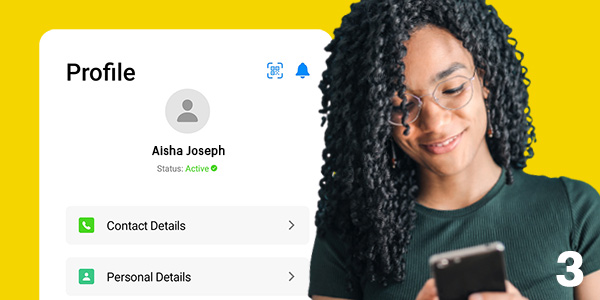
| 1 – 📞 CONTACT DETAILS |
| 2 – 🧑 PERSONAL DETAILS |
For part three of our Impressive Profile series, we’re getting right to the nitty-gritty. That’s right, today we’re tackling the all-important Profile Photos section.
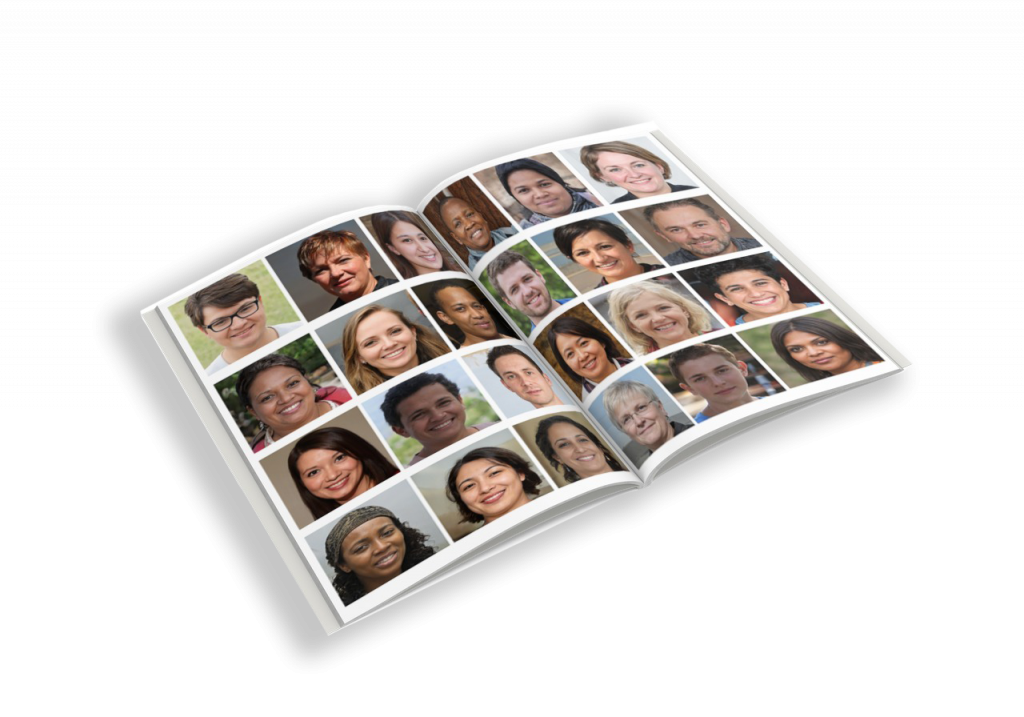
Photos are the most crucial part of any impressive profile. That’s because they’re what we use to show you off to productions that are looking for Supporting Artistes.
These images are taken from the UVE database and added to what we call a lookbook.
A lookbook is a something of a digital catalogue that we compile each and every time that we receive a brand new casting brief – these are what get passed to productions so they are able to browse and make selections on who they think will best help them build their vision on-screen.
In this sense, you can think of your profile photos like a first audition: an opportunity for you to make a great first impression!
To go forward for castings, every single UVE Artiste on our database will need a minimum of 2 photographs:
 | Standard Head & Shoulders A clear, high-resolution headshot (similar to a passport photo) that is taken against a plain background. |
 | Standard Full Body A clear head-to-toe shot (including feet) that is also taken against a plain background – standing straight with arms by your side. |
What makes a good photograph? 📸
To make sure you have the very best chance of getting cast, each and every image uploaded to your profile is automatically sent to our Artiste Support team to be checked against a few house rules.
Want to make sure your photos are accepted first time and you sail straight through those moderation checks? Here is what we’re looking out for:
Your photo sadly won’t make the grade if it is:
| ❌ | Rotated, Cropped to remove detail, or a Group photo |
| ❌ | Taken in front of a distracting / busy background (including doorframes, light switches, patterned wallpaper, etc.) |
| ❌ | Blurry / Pixelated |
| ❌ | Edited, Filtered or a ‘selfie’ |
| ❌ | Pulling an unnatural expression |
| ❌ | An extreme close-up that crops or distorts any of your features |
You’ll have no problems uploading suitable photos if they are instead:
| ✔️ | Clear, full-size with just one person in frame |
| ✔️ | Taken against a plain white or brick wall with no distracting features |
| ✔️ | High-resolution, as if taken on a smart phone or digital camera |
| ✔️ | Naturally-lit and with both arms down by your side |
| ✔️ | Front-facing with a plain expression or subtle smile |
Images that our team feel are unsuitable will be turned down, and you will receive an email detailing why we cannot accept it on this occasion. Don’t worry if this happens first time – you can use this as guidance on what to watch for on your next attempt!
Can I upload more than 2 photos to my profile?
Yes, you absolutely can.
Fully-activated Artistes will be able to upload up to 10 images to showcase their versatility as an Artiste.
You can then use these additional spots to upload images in various costumes and wardrobe options – such as suits, swimwear, uniform, formalwear, etc. (Take a look at which other looks can significantly boost your profile’s visibility in our Casting searches here!)
Now that we’ve got a good grasp on what kind of photos the team need in order to place you into productions, let’s take a little look at how we upload them…
Uploading for iOS
If you are an iPhone or iPad user, uploading photos is very straightforward, and goes a little like this…
- Open the UVE Artiste App and click Profile > Photos.
- Select the Green + circle in the bottom right corner
It’ll look a little like this:
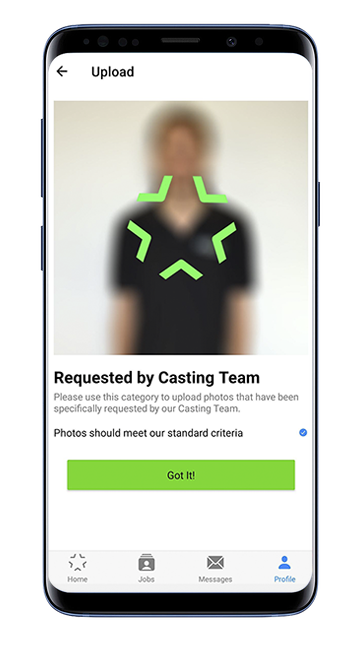
You will be asked to choose which type of photo you are uploading – for example, a ‘Standard Head & Shoulders‘, or ‘Business Suit‘. - Make your selection from the list and click ‘Got It!‘
Be sure to scan the prompts to make sure your photo complies with the UVE guidelines before uploading!
- Locate the image on your device
Your phone will ask you to select Camera or Photo Library.
We recommend using your phone’s camera to experiment with lighting and expressions (etc.) before uploading a photograph you are happy with from your Photo Library.) - Select and frame your photo
Your phone will automatically snap to the height of the selected image, but if you need to adjust or reframe, simply click the
 icon. This will allow you to edit the image’s aspect ratio, like so:
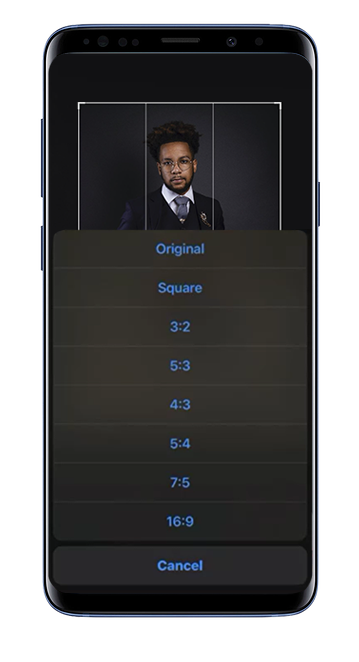
Each selection will offer you a different fixed ratio that UVE profile pictures can be accepted in.
Have a play around to find the aspect ratio which displays the image as clearly as possible, and does not crop out any important features – such as your feet, arms, shoulders, ears or hair – by dragging the white box across your screen.
Once you settle on a frame, the preview will black out any areas that will not be shown, allowing you to preview your new cropped image.
To revert back to the original at any time, simply select ‘Original‘ from the menu, and pinch to zoom out. - Hit ‘Choose‘ and then the green ‘Upload‘ Button
Your photo will now be submitted and sent off for moderation!
Uploading for Android
If you’re instead wielding a Samsung, Google, Sony, Motorola, OPPO or Xiaomi device, your process will look ever so slightly different:
- Open the UVE Artiste App and click Profile > Photos.
- Select the Green + circle in the bottom right corner
You will be asked for choose which type of photo you are uploading – for example, a ‘Standard Head & Shoulders‘, or ‘Business Suit‘.
- Make your selection from the list and click ‘Got It!‘
Be sure to scan the prompts to make sure your photo complies with the UVE guidelines before uploading!
- Locate the image on your device
Your phone will ask you to select Camera or Photo Library.
We recommend using your phone’s camera to experiment with lighting and expressions (etc.) before uploading a photograph you are happy with from your Photo Library.) - Select and frame your photo
Similarly, your phone will automatically snap to the height of the selected image, but you may adjust or reframe by scrolling left or right to find the desired percentage / scaling.
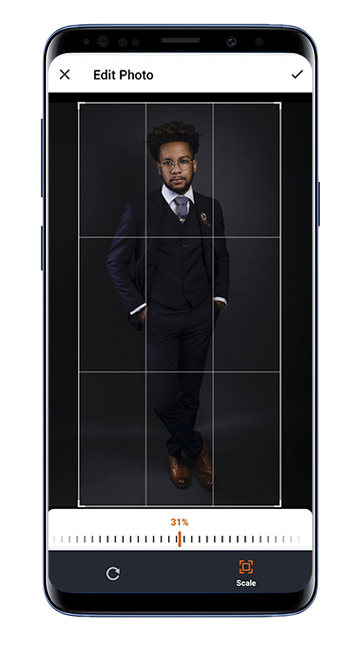
Have a play around until you’re happy by positioning the image using your finger, and simply release when fully satisfied.
Make sure your chosen image displays you as clearly as possible, and does not crop out any important features – such as your feet, arms, shoulders, ears or hair – by dragging the white box across your screen.
To revert back to the original at any time, simply select the undo arrow besides the Scale option. - Hit the 🗸 in the top right and then the green ‘Upload‘ Button
Your photo will now be submitted and sent off for moderation!
Please note that photo moderation can take up to 48 hours, and you will receive an email letting you know the verdict on your uploaded snaps as soon as it has been reviewed.
In the meantime, you can always keep an eye on the status of all your uploads in the Photos section of the app:
| Photos Pending Approval |  |
| Photos Approved |  |
On occasion, you may be asked to upload a specific look or photo angle to check your suitability to a role. This might come in the form of a Job Board request, or from one of the casting team themselves.
You can use the above steps to make sure you correctly upload new snaps for new roles whenever the opportunity arises!
That’s all from us today! Why not zip back to the UVE blog to explore even more content especially for the informed Supporting Artiste? 😉